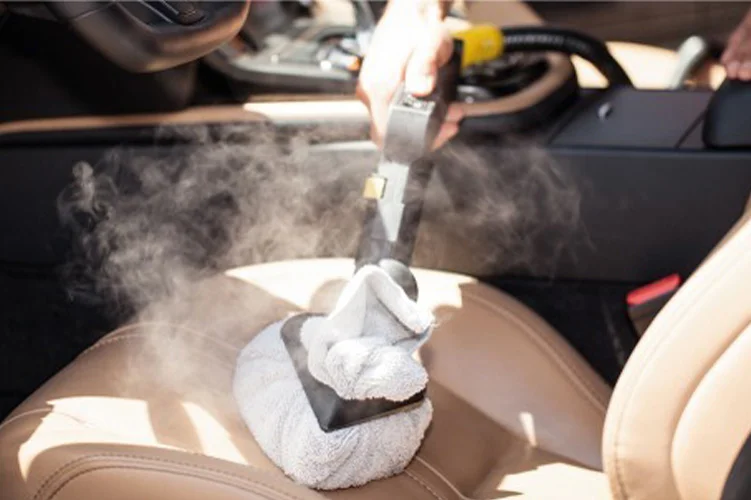
Introduction: Secrets to Restoring Leather Seats
Have you ever wondered how professionals achieve that perfect, clean look on leather seats? It’s simpler than you might think! Using affordable tools and products, you can achieve professional results at home. In this guide, we’ll walk you through the process, highlight common mistakes, and share four pro tips to make cleaning your leather seats effective and hassle-free.

Tools and Supplies You’ll Need
Before diving into the cleaning process, gather these essential items, many of which are readily available on Amazon:Read more: BMW M5 Review: Power, Performance And Styling
- P&S Express Interior Cleaner: Designed for leather, vinyl, and plastic surfaces, it leaves no residue and smells amazing.
- Zep Spray Bottle: An inexpensive and durable spray bottle for easy application.
- Scrub Ninja or Leather Brush: Ideal for gentle agitation without damaging leather.
- Medium Softness Toothbrush: Perfect for cleaning cracks and crevices.
- Edgeless 300 Microfiber Towel: A high-quality, versatile cloth for wiping and drying.
- Blow Gun and Air Compressor: Recommended for effectively removing dirt and debris.
Step-by-Step Cleaning Process
Step 1: Blow Out Dirt and Debris
Start by using a blow gun paired with an air compressor at 90 PSI max to remove loose dirt and debris. This crucial first step prevents scratching and damaging the leather during cleaning.
Pro Tip #1: Many modern leather materials have a protective clear coating (top coat or finish) that makes them durable and easy to clean. This coating also reduces the need for greasy conditioners, as it prevents leather from drying out and cracking.
Step 2: Spray and Agitate
- Spray P&S Express Interior Cleaner liberally over the leather surface and onto your Scrub Ninja or leather brush.
- Begin agitating the leather in small, circular motions to lift dirt and grime effectively.
The duration of this step will depend on the seat’s condition. Repeat until the desired level of cleanliness is achieved.
Pro Tip #2: Avoid harsh degreasers and all-purpose cleaners, as these cheaper products can degrade the leather, causing premature wear and tear or discoloration.
Step 3: Mop Up Cleaner
Using an Edgeless 300 microfiber towel, thoroughly wipe down the seats to remove all traces of the cleaner. This step ensures no residue is left behind, keeping the leather clean and residue-free.
Step 4: Clean Cracks and Crevices
Spray cleaner directly into the cracks and use a medium-softness toothbrush to agitate dirt in those hard-to-reach areas. Pull back the leather slightly to access deeper crevices. After cleaning, mop up the debris and clean it with your microfiber towel.
Pro Tip #3: Leaving dirt in cracks can lead to premature wear and tear. Cleaning with this level of detail dramatically improves the seat’s overall appearance and longevity.
Step 5: Final Blow-Out
Blow out any remaining loose dirt and debris from cracks using the air compressor. Follow this step with a final wipe to ensure every surface is spotless.
Step 6: Spot Treatment
Inspect the seats for any missed spots and treat them with additional cleaner and a toothbrush.
Pro Tip #4: Resist the temptation to use stronger chemicals for stubborn areas. Instead, focus on isolated spots with increased agitation and a little patience.
The Finished Look
After completing the above steps, your leather seats should look brand new! This detailed cleaning process not only revitalizes your seats but also protects them from future damage.
Common Mistakes to Avoid
- Skipping the Blow-Out: Starting with a dirty surface increases the risk of scratching.
- Using Harsh Cleaners: Degreasers and all-purpose cleaners can degrade leather.
- Neglecting Crevices: Dirt left in cracks accelerates wear and diminishes the leather’s appearance over time.
- Over-Conditioning: Modern leather with a protective coating rarely requires additional conditioners.
Why Use the Right Products and Techniques?
Leather care is about more than aesthetics; it’s about preservation. Using the right products ensures that your leather maintains its durability and elegance. Techniques like proper agitation, thorough cleaning, and detailed spot treatment make all the difference in achieving professional results.
Conclusion: Transform Your Leather Seats
Cleaning leather seats might seem daunting, but with the right tools, products, and techniques, it becomes a manageable and rewarding task. By following this step-by-step guide and incorporating the pro tips, you can enjoy spotless, rejuvenated leather seats that look and feel luxurious.
Have questions or additional tips? Share them in the comments below! For more straightforward, no-nonsense guides, don’t forget to like, comment, and subscribe for updates.

